Tuesday, August 31, 2010

Chair Back Storage Bags for Schoolchildren out of Jeans


                                                Storage bags made from backs of jeans

Storage bags made from the fronts of jeans

Some schoolchildren have tables and chairs rather than desks, so storage for school supplies needs to be provided. This is true in my son-in-law's first grade class this year. This solution uses upcycled jeans. I made 25 chair back bags and used 12 1/2 pairs of jeans plus 5 yards of denim fabric. The chairs were 17" wide across the back. Each bag took approximately 1 hour to make. Here is how I did it.

I shopped at thrift stores where the jeans were $5 or less, so each bag cost no more than $3 in materials. I looked especially for jeans with cute names on their labels. Just about any size jeans can be made to work, even children's jeans. Extremely large jeans would probably not work as well. I used the front and back pockets of each jean. For the bags made out of the backs of jeans, I used the material from the legs for the rest of the design. It used all of the material. So for the bags made out of the fronts of jeans, I used the purchased denim yardage for the rest of the design.

I also purchased 8 different colored bandanas for $.99 each. They were cut into four pieces with pinking shears. I cut off half of the plain border around the outside so that the bandana design would show above the pockets. These were ironed into triangles with 4 points showing and stitched to the pocket flap so that the pocket can still be used.

I used Schmetz Universal needles and went through about 10 of them on this project.

Most measurements depend on the size of the jeans being worked with. The part that fits over the back of the chair needs to be 18" wide by 20" long for a 17" chair and 1/2" seams. The pencil pocket just above the jeans back or front needs to be 13" wide by 4" long. A narrow slot about 1 1/2 " in from the edge of the pencil pocket is sewn in. I used a commercial sample as a guide.

First I cut out the jeans back and front. I cut straight across about 1" below the tip of the back pocket. This usually resulted in a depth of 10-12". I cut the front the same amount. I separated the back from the front. I cut out the heavy seam between and back and front of jeans. Anything to save having to sew over the heavy seams.

Next I trimmed back the width  on each side of the pockets, usually to parallel with the sides of the pockets. The width of the back needs to match the 18" of the piece going over the back of the chair. Since I had many different sizes of jeans, most with a waistband smaller than 18", I had to make up the difference with the backing piece. The top width of the backing piece is 18" plus 18-waist size plus 1". For example, if the waistband were 15", the top width of the backing piece would be 18 + 3 + 1=22". The 3 is 18" minus 15". The bottom of the backing piece would be the bottom width of the jeans front or back. The depth of the backing piece would be the jeans piece plus 1/2". Here is what it looked like before being sewn together.


To make the 18x20" piece from the legs of the jeans, I cut the legs apart at the non-topstitched seam. I usually had to piece the legs to get that size, especially with the skinny jeans. This took a lot of extra time. If I had it to do over, I think I would use the denim yardage instead. So much easier. I used the bottoms of the legs to make the tops of the pencil pockets whenever I could.

All seam edges were left raw. Sew the 18x20 inch piece to the backing of the jeans pockets. Sew the pencil pocket about 1 1/2" above the jeans pockets. With right sides together sew the sides of the 18x20" piece. I lapped the end of the piece about 1 1/2" over the jeans waistband. Turn the chair back part right side out. Sew down the overlapping flaps.

I ran the jeans through the washer and dryer. Then I clipped the ravellings from the seams. The resulting soft fuzzy edges should wear well. Voila, it's done!

Children's jeans can be used, as shown in the picture of the jeans backs, third from the left. I removed the zipper and used both the back and front pockets to get the width I needed.

I enjoyed working on this project and hope to hear soon how the kids like them.


Thursday, July 8, 2010

Delightful Praying Mantis Sculpture

We took the kids to Fort Collins today. One stop was the Gardens at Spring Creek where we saw this sculpture by Joshua Jones. It uses recycled materials to create a praying mantis.

Monday, June 7, 2010

Clothes in "Letters to Juliet"

Vanessa Redgrave plays the senior love interest in "Letters to Juliet." Her outfits were always pastel natural fabrics in simple, flowing shapes. I think they are really lovely.


Tuesday, May 18, 2010

My Article in Summer 2010 Altered Couture Magazine


"Victorian Ladies Coat" is the name of my article in the May/June/July 2010 issue of Altered Couture magazine. It is on page 73.

Tuesday, April 13, 2010

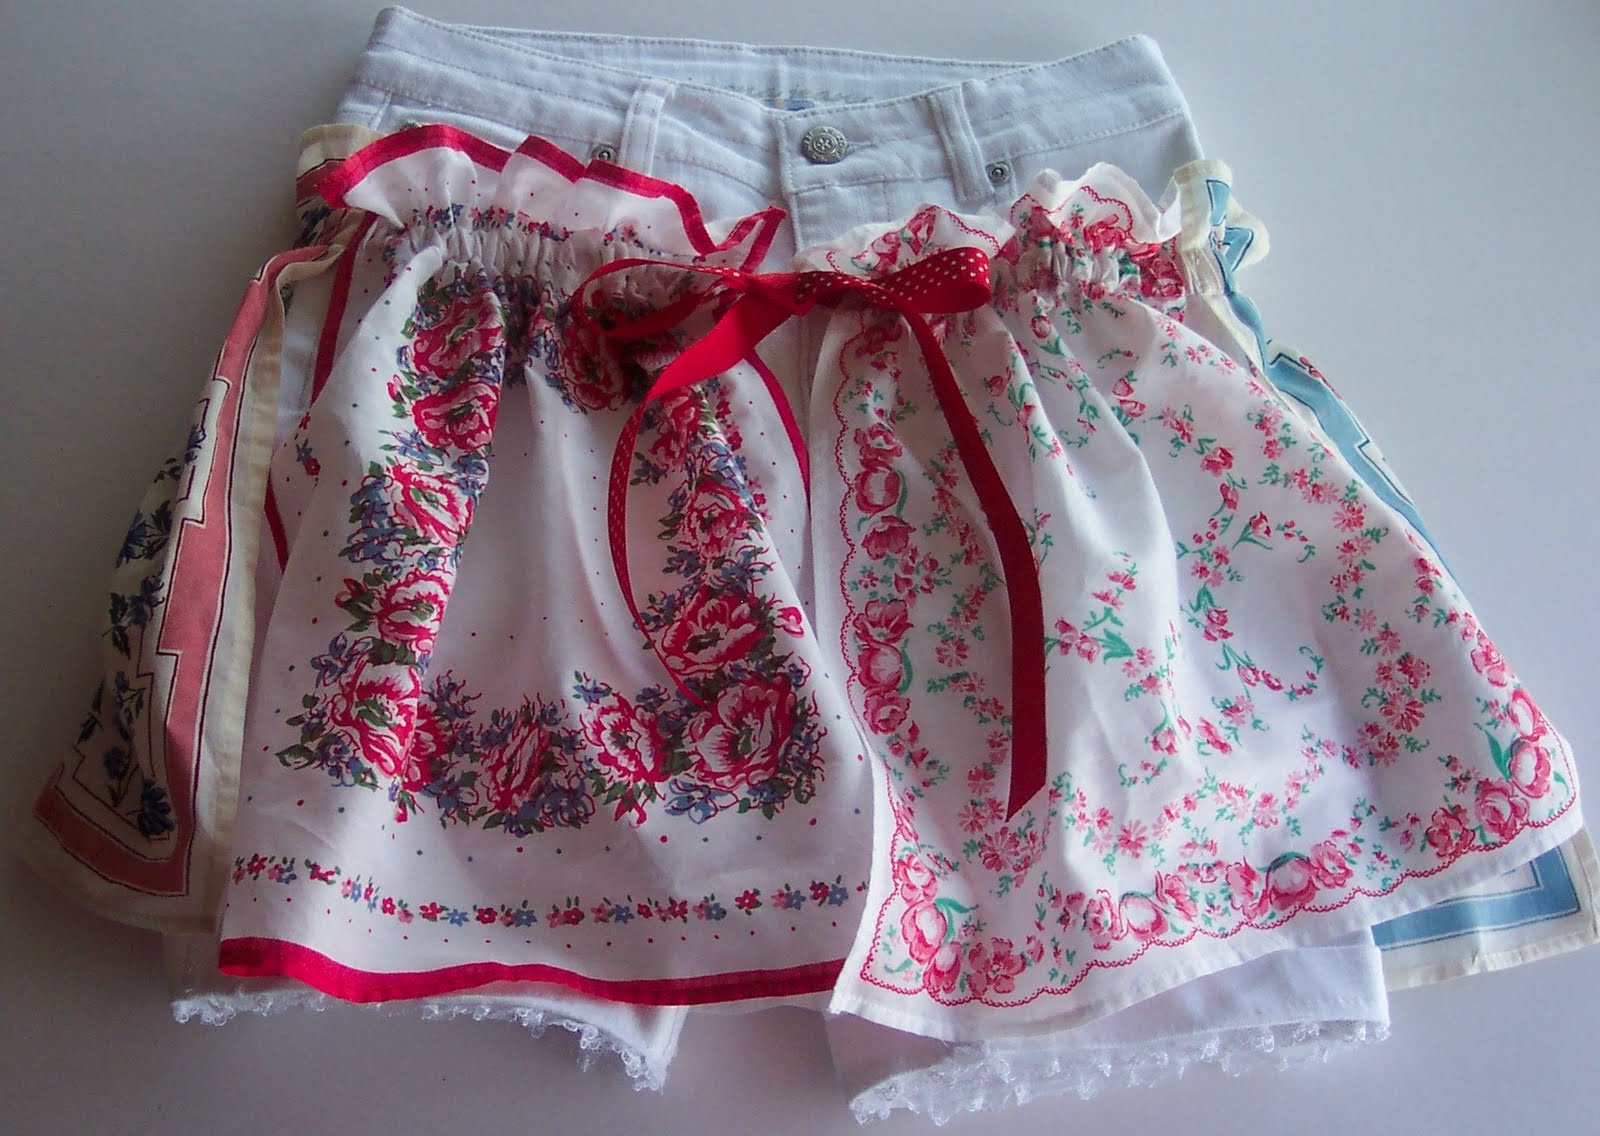
Girl's Hanky Skirt and Vest


Skirt and Vest Front                                 Skirt and Vest Back


Skirt Front                                                   Skirt Back

This handkerchief outfit uses the hankies gathered into a ruffle like a skirt. Four hankies sewn together make the vest.

Sew ½” lace ruffle around the legs of the shorts. Sew casing on the backs of five hankies 1 ½” from the top. The hankies are not sewn together, but I overlapped them ¼” where they join. Run the ribbon through the casing and adjust the hanky skirt to fit the shorts just below the waist. Cut the ribbon leaving ends long enough for a nice bow. Hand sew this skirt to the shorts so that the pockets remain usable.

Sew four hankies together diagonally except at the front to make the vest. The triangular flaps in the seam allowance on the inside were just sewn down, not cut off. This made the vest a little more substantial. Sew ribbons across the shoulders and ribbons at the front opening for a bow.

Items used to make this outfit are as follows:

Bermuda shorts and top
3 yards 5/8” ribbon
9 hankies
1 yard 7/8” ribbon for casing
1 yard ½” lace ruffle

I had enough hankies left over to make another vest:


          Vest Front                                             Vest Back

Wednesday, March 24, 2010

Jacket + Sweater = Cropped Jacket + Dress


A good quality but rather boring plaid jacket is spiced up by being cut under the bust into two pieces. The sleeves are cut at the same line. Trim is sewn around the cut edges. The bottom of the jacket is sewn on to the bottom of the sweater. The sleeve bottoms are opened up and sewn together in a square. Triangles are sewn at the side seams to create a bottom for the handbag. A stiff insert is fit into the bottom of the handbag. Eyelets are made at the top of the handbag seams. Split key rings insert into the eyelets, and the handle attaches to the rings.

Tools and Materials

Jacket
Sweater
2 yards trim
2 eyelets
2 split key rings
Stiff insert for handbag bottom
Handbag handle
Thread, scissors, pins, sewing machine

Cut the jacket, lining and sleeves under the bust, adding ½” seam allowance for the trim, and sew the trim on top. The bottom of the jacket and lining is sewn on to the bottom of the sweater just above the ribbing. Place right sides together and stitch.

The sleeve bottoms are opened up at the seam opposite the buttons, which will be at the top of the handbag. Pull the lining up out of the way, and sew the jacket sleeves together down the sides and across the bottom. Triangles are sewn at the inside bottom of the two side seams to create a flat bottom for the handbag. A stiff insert is fit into the bottom of the handbag. Then sew the lining together around three sides, add the triangles, and push the lining into the handbag. Eyelets are made at the top of the handbag seams according to the package directions. Split key rings insert into the eyelets, and the handle attaches to the rings.

The cropped jacket and handbag were shown in the 2009 Summer Issue of Altered Couture Magazine.

      Jacket and sweater before


Wednesday, March 17, 2010

Fringed Tweed Jacket


A thrift store tweed jacket gets a new look similar to a jackets seen on the current Chanel runway. The sleeves are cropped just below elbow length and fringed 1". The sleeve linings are turned under and sewn together with the coordinating braid attached just above the fringe.

The  bottom of the jacket is cropped at the waistline, fringed 1", lining turned under and sewn together with the braid around the bottom, front openings and neckline. Some of the cropped off material is cut 4" wide and pieced to about 48" long, and gathered to form the ruffle around the neckline.

Chest pockets are removed from the original jacket and replaced on the new design.

Because the tweed is busy and a loose weave, it turned out OK to zigzag stitch the buttonholes closed. They really don't show. I used 3 yards of upholstery braid. The one thing I would do differently is to taper the back a bit lower than the front.

Jacket Before